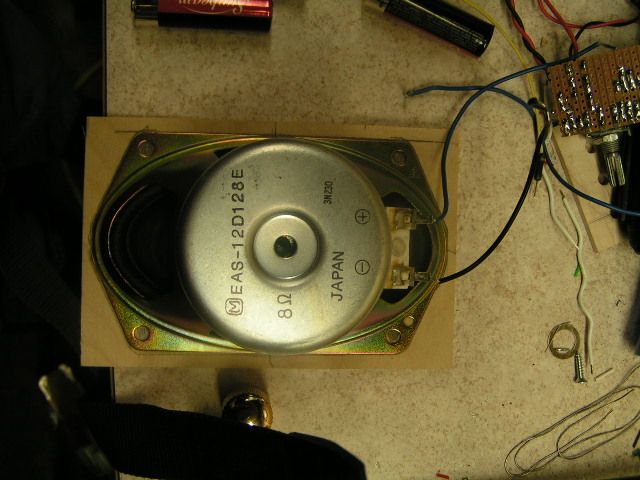
When I started to make amps I ordered 20 each of some affordable (2.5"x4" and 3"x5") speakers from Parts Express. So in the interest of making it easy to make repeatable speaker covers or grills I set about to make a template for each to speed the process down the road. If you use varying speaker sizes this same process can be used with a universal template by using the center hole for mounting the template to the box. I figured I would share the process to hopefully help others.
Start off by tracing your outline and mounting holes onto a piece of 1/4" plywood.
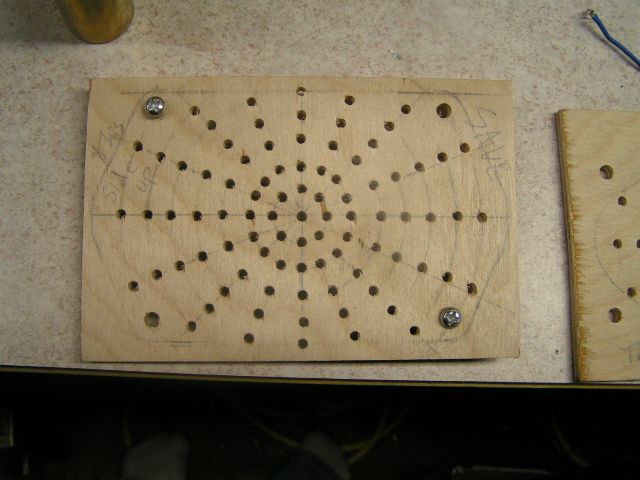
Find the center of your outline and draw vertical and horizontal each dividing the outline in half. (I starting taking pics late so I'm a bit ahead here)
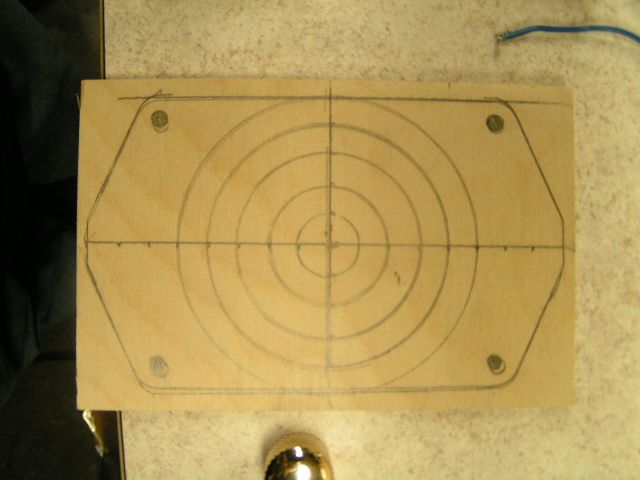
Measure and mark out from the center. I've found 5/16" to be a good spacing when using an 1/8" drill bit for the holes.
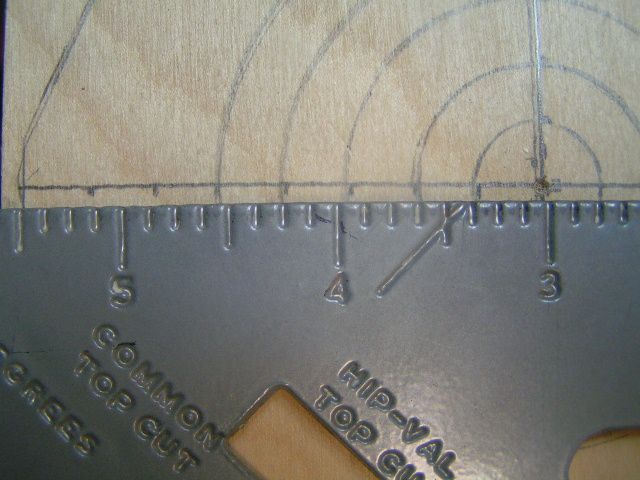
I then use a compass to draw out the circles. Once I have the cross hair and bulls eye I add 45° lines and measure and mark from the center, the same as the first two lines.
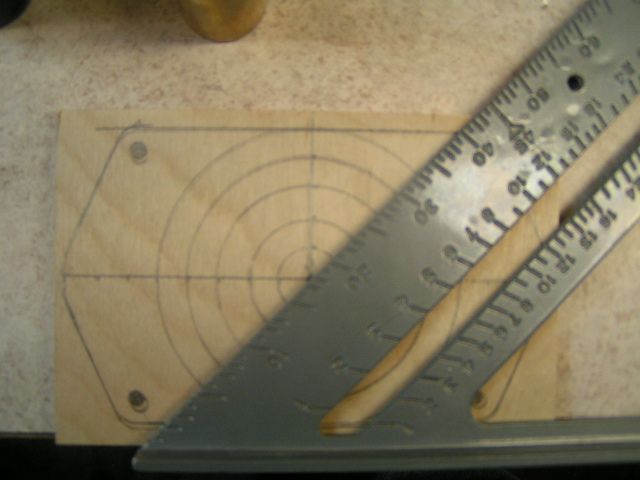
I didn't get a picture of the next step but divide the eight segments you have drawn out in half. Using the outter most circle measure from the 45° lines to the vert/horiz lines then cut that measurement in half for where you need to mark. Once marked use a straight edge connect marks through the center. These last lines won't get holes all the way to the center.
With outline dividing lines drawn put a dot everywhere a circle meets a line. This isn't nessecary but I like to do it to make sure I'm happy with the pattern before I start drilling. Should you do a larger cover and the holes get too spaced out for your liking you can continue to divide the pie pieces in half in the same manner as above and start new lines of holes.
Once I'm happy with it I use a brad point bit to dimple where each hole is to keep the bit from walking when I drill. Then just start drilling and you will end up with your template like this. Don't forget to drill out the mounting holes with the appropriate bit.
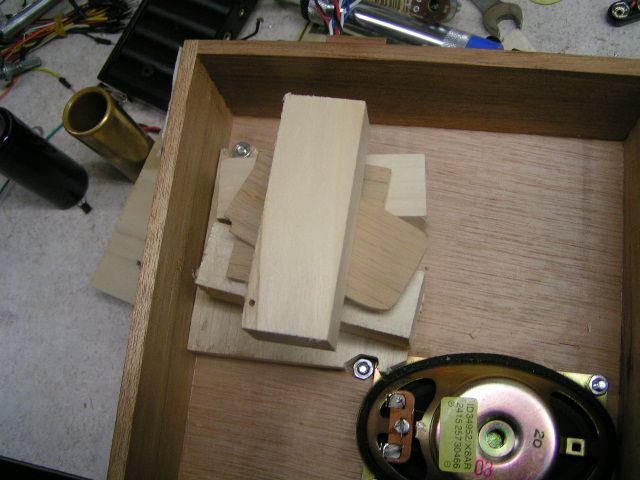
With the template made it's time to make some holes in the box. I start by laying the speaker inside the box and find where it will go. Once I'm happy with the placement I mark the mounting holes. I drill a small pilot hole from the inside, then redrill from the outside with the correct size bit. This avoids measurement mistakes and tearing/splintering of the good outside face.
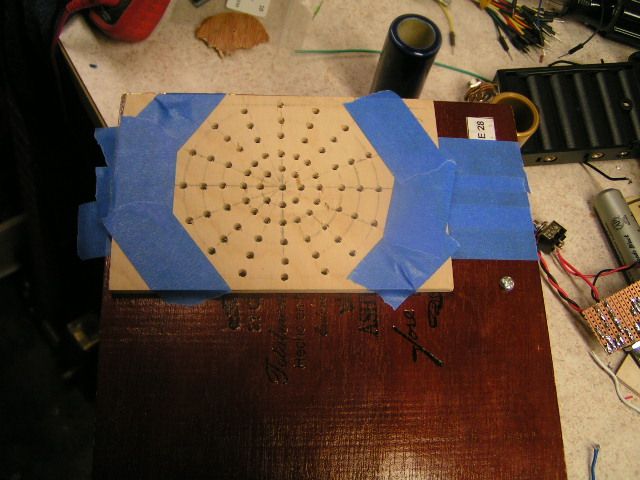
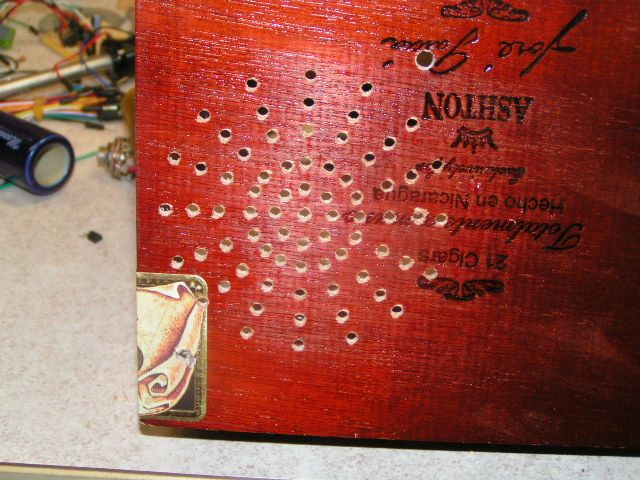
With mounting holes drilled cover the outside of the box where you will be drilling with masking tape. This is the most important part in getting good clean holes don't forget it! Then mount your template to the outside of the box.
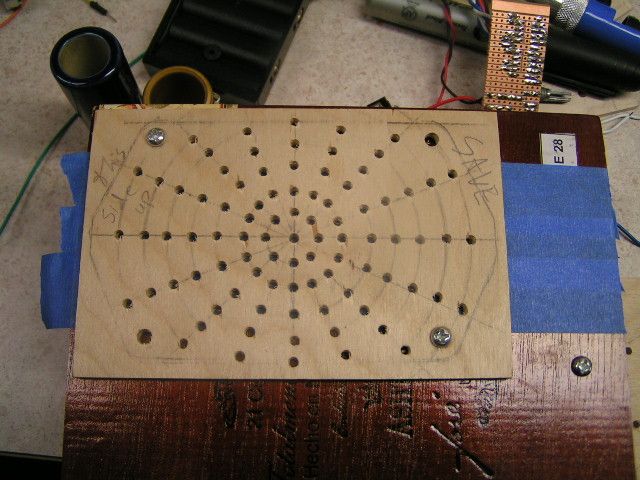
The pattern above looks good on a cover but I didn't like it for just an on the box grill. So to avoid misplaced holes I cover the unwanted ones with masking tape. I've also done this to retain artwork/lettering on the box I wanted undisturbed.
The 2nd most important part is to getting clean holes is to us a backer inside the box. Any old flat piece of scrap will work. Do make sure it lays flat against the inside of the box. (it may need to be notched)
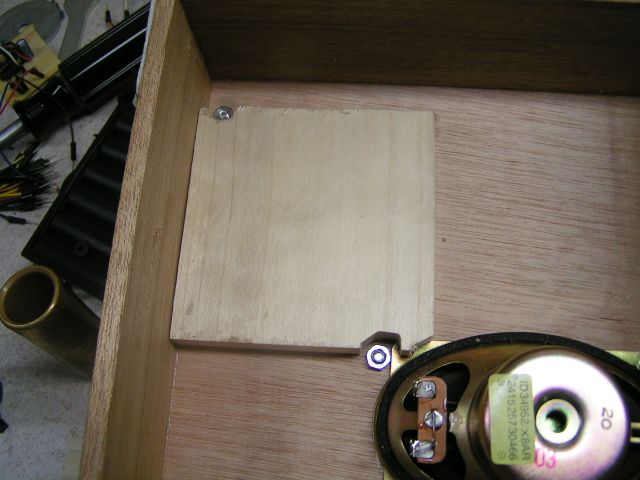
Now you can take the time to drill out mounting holes and mount the scrap blocker with the same screws as the template. I've found it easier to just add various sizes of scraps so that when I close the box it holds the backer snugly in place.
Now it's just a matter of drilling through the holes in the template. I use a drill press but careful use of a hand drill will work just as well.
Most of the time a light sanding to knock the nubs down can be done without harming the finish enough to require a touch up. The finished product.
Replies
Good job. I was going to do an array similar to yours, but decided to just do 9 3/4" holes in a 3 x 3 array
That's definitely less work Jim and I hadn't considered bigger holes but it does give me some ideas. Really like the cork knob too. Thanks for posting that.
Looks like we have the same style of grill. Thats not a bad idea making a template, why didn't you suggest that before I made all mine, lol
Michael, I might have suggested it before you made your's but I'm not too sure your's weren't the inspiration for mine. :-)
Well I knew I was good for something. They are fun to make and yours look good. Maybe I will be inspired to make a few templates next time I build a few amps.
Good tutorial my man! Try a Forstner bit, I have a set like this and it will make nice clean cuts every time. It won't round out your template either so it's good for a looong time :-)
Good thought, I'll have to look for an 1/8" forstner my set doesn't have one.
Thanks for the post. You might consider using a brad point bit, it should help avoid the tear out on the front side.
The worst of the tear out in the center horizontal line is from my own fault by not putting my tape out far enough and why I stress the tape between the template and the box.
A brad point bit is an option and would help on the tear out, but since they aren't as forgiving at self centering on the hole in the template I find it too rough on the template. Thus I use the tape method and live with a bit of tear out.
Good stuff. Thanks Ross!
-
1
-
2
of 2 Next